
I decided to make a cake for the concert's reception. I was going to make a Star Wars cake (since the concert took place on May (the) 4th (be with you)), but realized a little late in the game I'd need more fondant than I had for that. Instead, I decided to make a fun spring/summer cake. Besides the flowers that are starting to bloom all around us, I'm most excited about berries coming back into season. No more tasteless strawberries! Because of this, I decided to make a "berry basket" cake! It's a super cute cake topped with fresh berries.

Here's how to make the cake
Bake two 8" cakes. Travis requested my Chocolate Stout Cake with chocolate buttercream icing. Then...

1 - Once they cool, level the tops (cut off the rounded tops so they stack evenly!), and cut them into four inch squares.
2 - Stack one square on top of the other, with a generous layer of icing between! This will be your basket. I made three baskets for my cake. Each basket should be on a piece of cardboard. Once stacked, put your baskets in the refrigerator (uncovered) for 45-60 minutes.
3 - Now it's time to shape your baskets. This is a pretty simple carve - the baskets are a little smaller at the bottom than top, so carefully whittle away the edges until they're smooth. Then cut the middle out of the top, leaving a thin edge of cake.
4 - Here's what your baskets will look like once cleaned up a little! If there are some holes, don't worry - you can fill them in with icing. :)
Now to give your baskets a thin layer of icing. You'll want to thin some of the icing you're using with a little water so it glides on easily. Give the baskets a thin layer all over, then refrigerate for 1-2 hours to let the icing set.


While the cake baskets are in the refrigerator, start mixing the fondant that will cover them. I used "Kelly Green" Wilton gel coloring. You'll need to add Crisco to the fondant as you mix the color in, or it will get very sticky and tough to work with.

Spread Crisco over some wax paper or (clean) counter top and roll out some of your green fondant. If your baskets are the same size as mine (4"x4"x4.5"), that means you need a 16" x 5.5"

Wrap this around circumference of the basket and over the top lip. The center of the top will still be exposed, but that's ok! Clean up the "seam" with an exacto knife to keep things tidy.
Now it's time to cut the drainage holes around the bottom. Remove the fondant and use a skinny tool (or toothpick) to pull out about 1/4" of cake. Then, using a rounded tool (or your clean finger) and push the remaining cake to smooth out the cut-outs.


Now to add the top lip. Roll out another, thinner strip. Mine was about 1.5" wide and 16" long. Fold the top 1/3 over on itself.
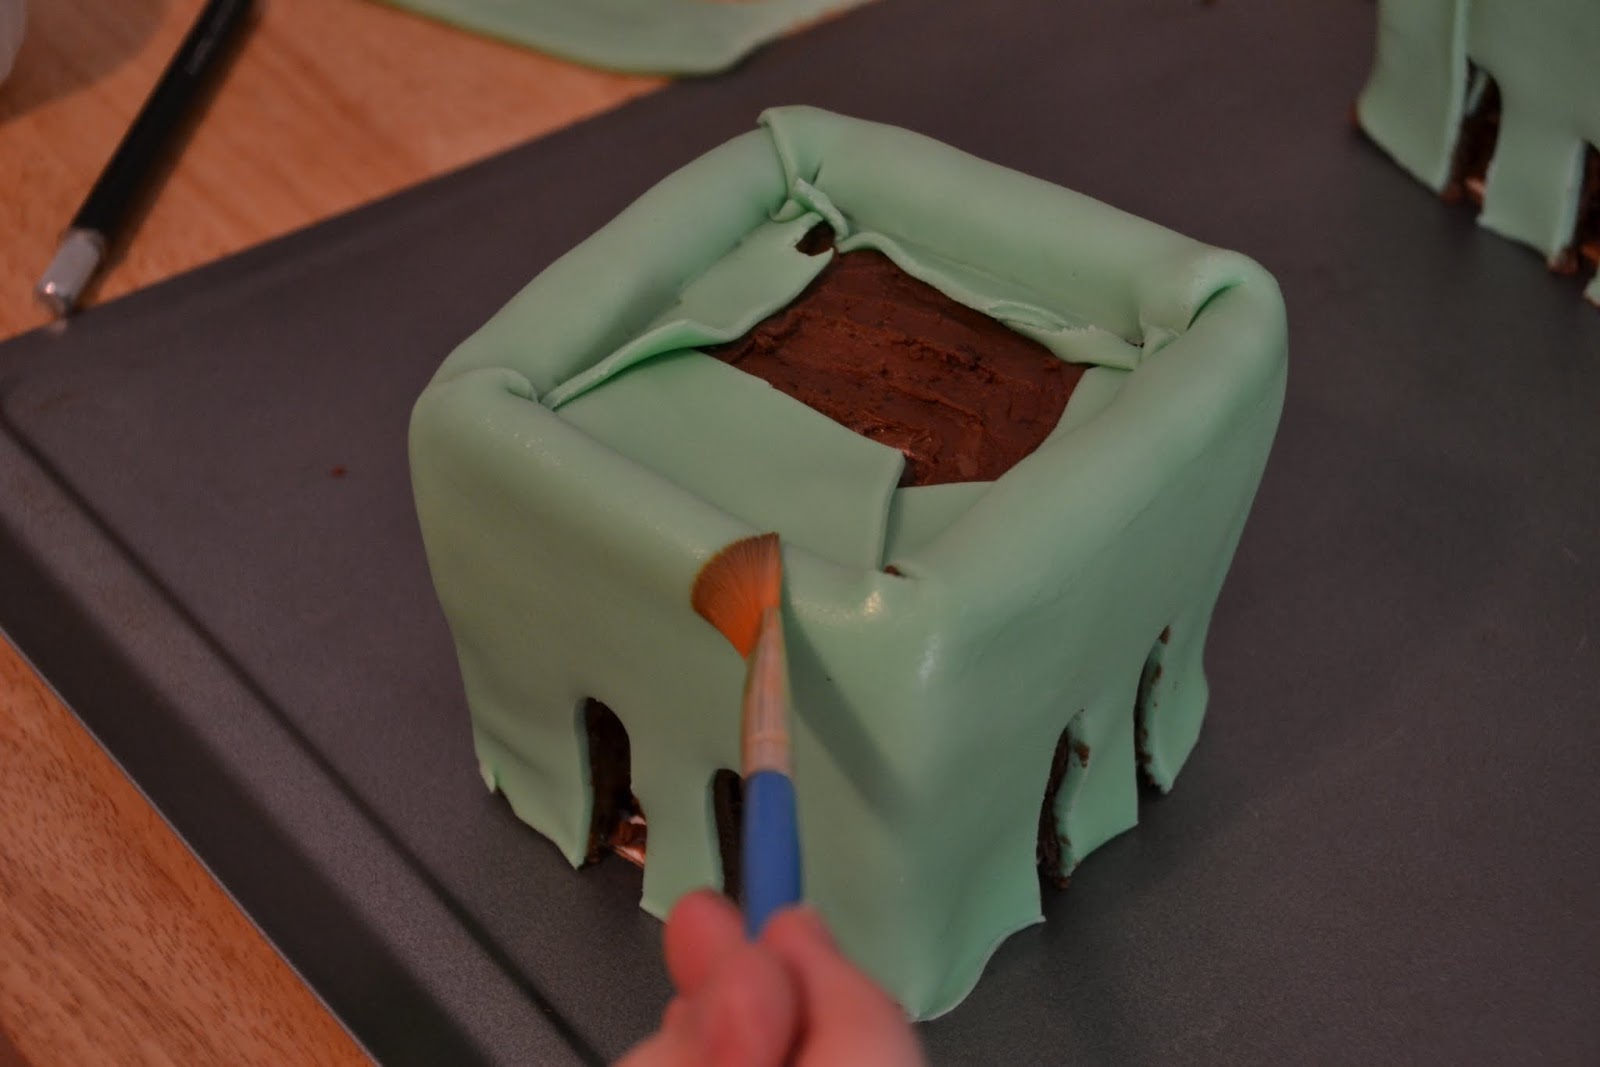
Then, with a paintbrush, brush water along the top 1/2" of the basket, where the strip you just made will go. (The water helps fondant stick to fondant.)
Wrap the strip around the top of your basket, with the doubled-over edge sticking up above the top of the basket (facing in).


Then fill the tops of your baskets with your (washed and dried) fruit. I chose strawberries, blueberries, and blackberries. You could also use raspberries or cherries if you'd like! Put the baskets back in the refrigerator.

Now it's time to make the board for them to sit on. Presentation is always key to a great cake. These would be nice sitting on a table as is...but are even better on a cute board to tie the entire thing together! I decided to make a checkered tablecloth board. I used a large, rectangle, piece of cardboard as the base.
Mix some red fondant (I used "No-Taste Red") and roll out each color and cut 1.5" squares. Put a thin layer of clear piping gel on the board, then layer the squares in a checkered pattern!


This was a huge hit at the reception - no one guessed it was a cake until they were told!


Later this week, I'll tell you about our celebratory dinner out and post some recordings from the concert! Check back for more!

Another unbelieeeeevable Lauren creation! SUCH an awesome job on these little cakes!
ReplyDeleteSuper stinkin' cute!!!
ReplyDeleteThanks Courtney!
DeleteKudos to your husband!! And huge kudos on cake...so cute!!! This would be perfect for our summer party. Definitely bookmarking this one.
ReplyDeleteFrom your newest follower,
Kelly
http://www.beso519.blogspot.com
Thanks Kelly - he worked really hard! Almost done!
DeleteOh my gosh, Lauren, I LOVE this!!! Pinned!!
ReplyDelete--Elena
Thanks Elena!
Deletei thought they were really cartons of strawberries, blackberries, and blueberries and you were just showing the fresh ingredients you were using to make a fruit cake. so fun! and so talented!!
ReplyDeleteThanks Melissa! Several people took a handful of berries, thinking it was just an ill-prepared fruit salad before they were told it was cake. Haha! By the way - I loved the video you all did letting your kids know if they were going to have a little brother or sister...too cute! Congrats!
DeleteHold up! I just had to scroll back to the beginning of the post to see that first photo. OMG, it's cake. Seriously, you're really talented. I love your attention to detail.
ReplyDeletexM
PS the last photo made me sad, did they have to eat it :) haha
Thanks Melissa! The detail really makes a cake, I think. :)
DeleteThere have been a few cakes I was really sad to cut into - this one wasn't so emotional. Hahaha. I made a starry starry night cake once that I almost cried when it was cut. I haven't posted a blog with its pic yet, but here's a pic from my pinterest board - http://pinterest.com/pin/124693483402527582/
Holy cow, that's amazing! I honestly thought they were just cartons. Well done!
ReplyDeleteThanks Calli! :)
DeleteI found you from the YHL link up and am SO impressed!! It looks great. I can't believe you made that!
ReplyDeleteThanks Stacey!
DeleteOh my gosh, this is so cute! I love it. I came here from That Friday Blog Hop and I really like your blog. I'm a new follower on GFC and looking forward to reading more. :)
ReplyDeleteJennifer
http://thistlebearhome.blogspot.com
So adorable! Thanks for the awesome tutorial!
ReplyDeleteThis is absolutely adorable! So clever!!!! Thanks for sharing at Give Me the Goods Monday link Party! Will be following and pinning!
ReplyDeleteThanks Amy!
Delete