A shark party, you may ask? How fun could that really be? Well let me assure you there's nothing like a crazy shark flick, silly costumes, thematic food, a giant remote controlled helium balloon shark, and crazy friends to make a fantastic evening! I'll share a few pictures from the night later, but first I'm going to show you how to make a super-cute shark cake that will impress your guests (and not cause you too much of a headache).
This cake will serve between 12-16 people. Use this post as a how-to if you'd like to make this cake yourself...or just enjoy the progress pictures! It's kind of fun to see how it comes together!

Here's what you'll need
Three 8" square cakes
Buttercream frosting
Fondant
Black gel color
Brown gel color
Blue gel color
Red gel color
Crisco
Toothpicks
Wooden skewer
Rectangle cake board
And here's how to assemble your shark cake...

1 - Cut two of your 8" cakes so they are 5" x 8".
2 - Now you're going to stack your shark. Place the two 5" x 8" takes on top of each other. Then place the two extra strips you cut off together on top of those (to make three layers).
3 - Ice between these three layers, re-stacking.
4 - Spread some icing on a cake board and place your cake on top to secure it. Then ice the outside of the your cake and refrigerate for 1-2 hours until icing firms.

5 & 6 - Now it's time to carve the cake! First we're going to carve the shark's mouth. It's a good idea to trace out your cuts with the tip of your knife before cutting - you can always take more cake off, but you can't add it back on! This cut should start at the top of the 2nd layer of cake and curve down to the cake board, but should not go all the way through the cake. You're actually going to cut a chunk out of each side, leaving about 3" in the middle, which will be the boat.
7 - Carefully angle the first layer until it reaches to top of the boat. This angle should not be as steep as the mouth angle.
8 - Cut a 5" x 3" piece out of your third 8" square cake, and place it on the board at the back of your shark. With the tip of your knife, trace the shape of your shark on one side of the cake. Once you're happy with the curve of the shark, begin cutting pieces of cake off until you're happy with it! Just remember - cut carefully - you can always take more off.

9 - Continue taking bit by bit off your shark - round the corners at the top (sharks aren't square!), smooth the edges of the cake...get creative - he's your creation! Add a small (two layer) piece of cake to the front of the boat, so it extends about 1.5" past the top of the shark's mouth. This is going to be the tip of the boat your shark is chomping on. (If this little piece tries to fall off, use a toothpick to attach it to the rest of the cake.)
10 - Carefully shave away at the "boat" until it looks like a boat. Your boat should be narrower at the tip, slope inward at the bottom, and have a lip (the railing) around the outside (so pull a little cake out of the inside top). Cut away most of the excess board so it mirrors the body of the shark. Do not cut the board to fit the shape of the boat too - it will be too flimsy. We'll cover that up later! Then ice the entire cake and place it in the refrigerator for 1-2 hours to set.

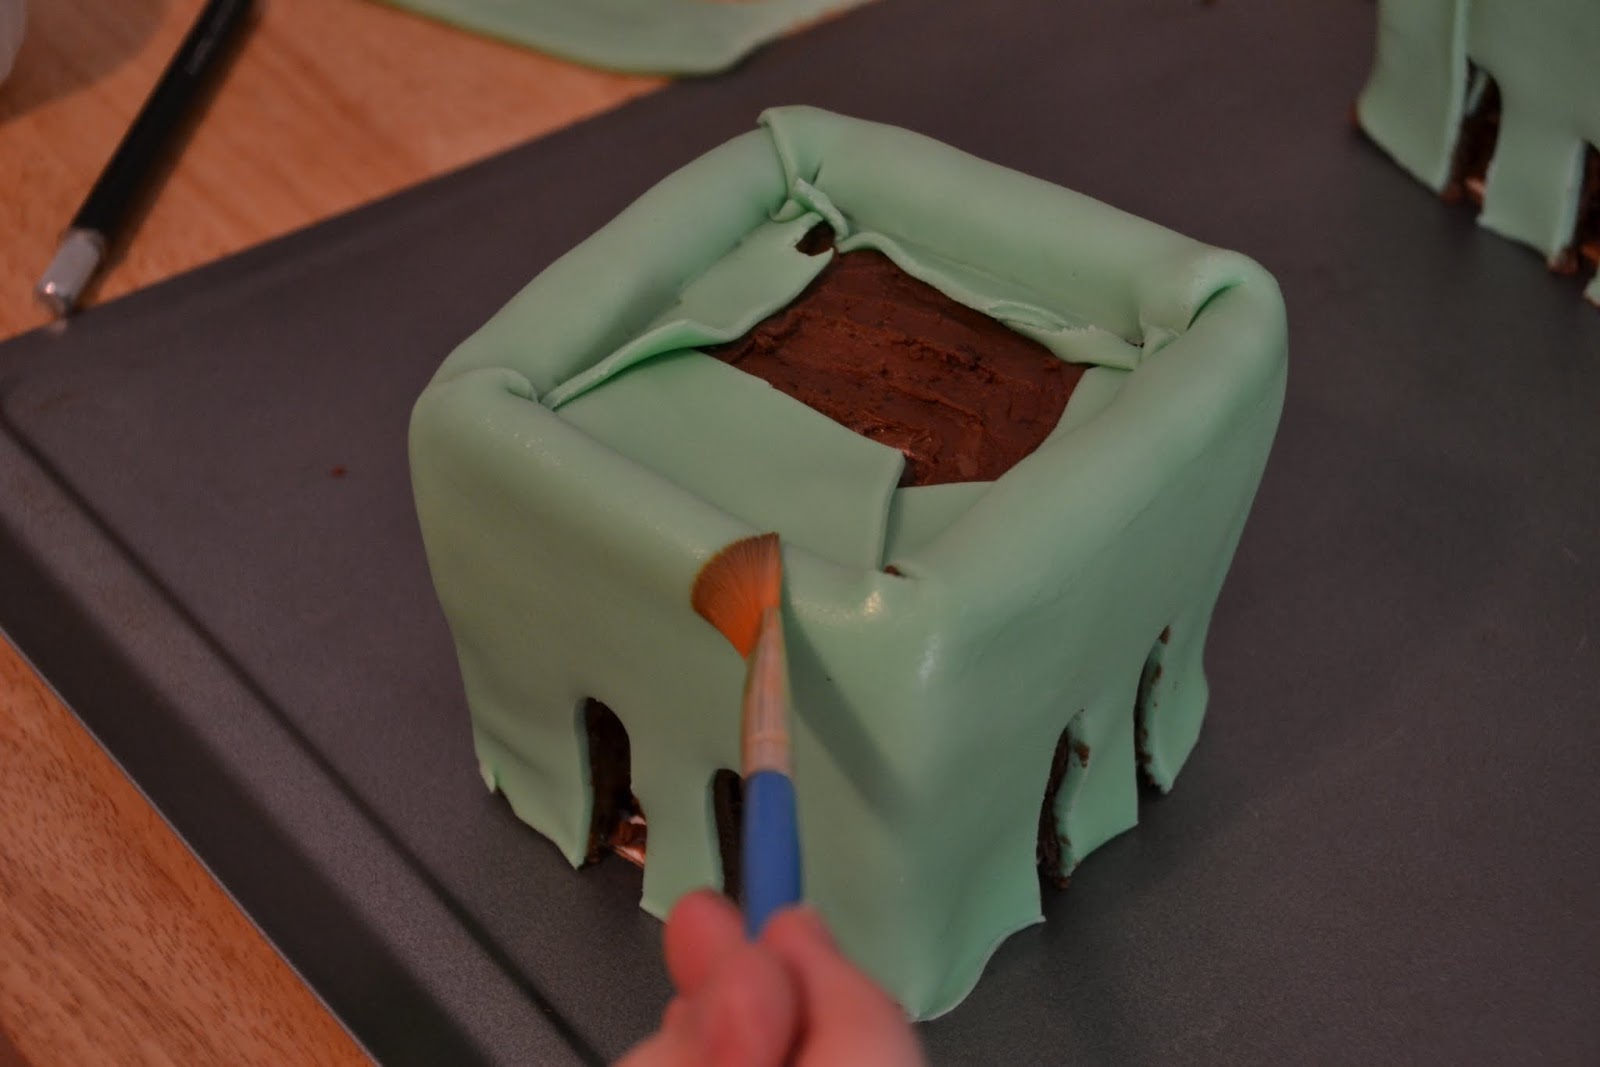
11- Mix grey fondant (white with a little black), until the color is consistent. As you're working with fondant, you'll need to add a little Crisco to the ball so it doesn't stick to your hands. Tape two sheets of wax paper on a flat surface and cover it with Crisco. Roll out your grey fondant so it's about 1/4" thick, then carefully cover your shark body. Using scissors or an exacto knife, cut the grey fondant so it ends at the edge of the sharks "lips".
12 - Mix pink fondant (white with a little red), until the color is consistent. Roll out small pieces and fill in the area that would be the shark's open mouth.
13 - Mix light brown fondant (white with a little brown), until the color is consistent. Roll out a piece and cover the entire boat in one move. Cut three long, thin strips of the brown, that will be the upper rail and "boards" on the front of the boat. Measure the appropriate lengths and attach to the boat by dabbing a little water on the back of the "board". (Water helps fondant stick to fondant.) Using a butter knife (or the side of the fork), gently draw the rest of the boards along the sides of the boat. Place the cake back in the refrigerator for another hour while you work on steps 14 and 15.
Roll out more pink fondant and cover the rest of the inside of the mouth.

14 - Now it's time to make the accessories! Roll out some white fondant and cut out teeth that are approximately 1/2" long. Cut toothpicks in half and slide the toothpick halfway in the tooth. Set these aside so they dry - the worst thing that could happen to your shark cake is for it to have floppy teeth!
15 - Roll out more grey fondant (thicker than the teeth). Using a pizza cutter, cut out the shape of a shark fin. Slide three toothpicks along the edge that will touch the shark so they are about 1/3 in the fin, 2/3 sticking out. Let the fin set until it's completely dry. (Second worst thing would be a floppy fin...)
Now it's time to make the mast for your boat. Make a little "snake" of brown fondant. Wrap the fondant carefully around about half of a wooden skewer and carefully roll it with your hands until it's no longer lumpy. Cut out a rectangle piece of red fondant (add a little more red gel to the pink that's leftover from the shark's mouth) and attach to the top of the dowel using a little water. If you have food-safe markers, feel free to decorate the flag. I decided to go with a K, for Krentz (the last name of the friends throwing the party). Nothing like having your shark eat the family boat of your hosts! ;)
Once your shark's teeth are hard, stick each one around the rim of the shark's mouth. Using small ovals of white fondant, place on the shark's eyes (attach with a dab of water). You can draw on the pupil with a food-safe marker or by adding a smaller dot of black fondant. Then, using a butter knife or edge of a fork, carefully etch in the shark's gills (three on each side). Be careful not to cut through the fondant - you just want to etch them into his skin.

Spread more white icing down the middle of the covered board, and place your shark cake on top.

Color some of your buttercream icing with blue gel and fill a piping bag (or a Ziploc bag with one corner cut off). I didn't use a piping tip for this - I just cut the tip off the disposable piping bag. Fill your bag with the blue icing, and pipe waves around your shark. Make sure your waves cover up the white board around your boat, then go down the sides of the shark. The piping motion you'll be using is more pressure at the beginning, then less pressure as you pull away.
The final touches are the fin and boat mast - carefully stick the toothpicks into the shark's back, where you'd like the fin to live. Then stick the end of the boat mast in right at the back of the boat, coming out at an angle.
Make sure your cake stays in the refrigerator until you're ready to serve. Then remove about 45 minute to 1 hour before you're ready to cut in!
for fantastic recipes, cake how-to's, and diy projects!


Now...go wow your friends!