Showing posts with label DIY. Show all posts

Wednesday, April 8, 2015

How to make a diaper cake

After having our own baby showers for little Owen, I realized how coveted diaper gifts were for parents-to-be.  Diaper gifts were going to be especially important for our friends Barb and Dave, since they're having TWINS (any day now!).  Instead of giving them a box of diapers, I decided to make a diaper cake!


Diaper cakes are incredibly easy to make and really cute.  They look great on your food table and are an easy way to add height to the table and tie in your theme!  If you can roll diapers and use rubber bands, you can make a diaper cake.  I have confidence in you!

You'll need:

60-75 diapers (mostly white)
Rubber bands (~100)
Paper towel roll
Ribbon
Straight pins (6)
Cake Stand
A section of a plastic tablecloth (or fabric) approx 3-4 foot square (depending on how large your cake stand is
Assorted decorations

First, roll up your diapers.  Roll them so any graphics across the front stay on the inside (you want a white outside) from bottom to top.  They should be snug, but not super tight.  Wrap each with a rubber band around the middle to keep in place.  You don't want the rubber band so tight it indents the diaper, so loosen if you need.


Once you've rolled 60 or so diapers, it's time to start assembling the bottom tier of your cake.  Start by surrounding the bottom of the paper towel roll with your rolled diapers.  Once you've formed the first layer, put another rubber band around the group to secure.


Then surround that layer with another, and secure the group with another rubber band.  Continue with a third layer to finish the bottom tier.  (Tip:  As you get to the second and third layer of rolled diapers, it gets easier to put the rubber band on first and slide the rolled diapers in as you go.)

Once the bottom tier has three layers of diapers, you can start on the second tier.  Construct in the same way, only this time just do two layers of diapers.  Then move on to the top tier and do one layer of diapers.


Isn't it nice that a paper towel roll is the same height of three rolled newborn diapers stacked on top of each other?  Works out perfectly!

I stuck rolled up diapers inside the paper towel roll at the end too, so the top wouldn't be empty - you don't want to see a hollow tube at the top of your cute cake!


Next up - the ribbon!  You'll want to select a ribbon that is about 1/3 the height of the diapers you're using.  You'll be wrapping it around the middle of each tier, covering the rubber bands.

Secure the ribbon in the back with pins.  One pin in the top corner where it starts, and a pin in the top and bottom corners where it ends to hold in place.  If you have pins with tops the same color as your ribbon, awesome!  If not, just make sure they end up in the back.


Then I made a simple bow to put on top of the cake and secured it with another pin through the back.

Next I covered my cake stand.  The glass cake stand is nice for some things, but didn't fit the "feel" of my diaper cake, so I decided to cover it.  I used the end of the tablecloth I didn't need (you'll need a 3-4 foot square depending on the size of your base) so it would tie in nicely with the rest of the table.

Lay the cake stand upside down in the center of your fabric.
Gather the ends around the entire stand.
Tie a ribbon around the top of the pedestal, close to the plate.  You could also use a rubber band.
Cut away the excess fabric, but leave enough so it will hang to cover the entire pedestal.


Now put it all together!

I wanted to keep the other decorations on my diaper cake simple, so I went with a monkey, giraffe and passie.  "Monkey" and "giraffe" are the nicknames given to each of the baby girls we were celebrating that day.

Turned out pretty nicely!


All the parents-to-be have to do is unroll the diapers as they need them!  Talk about a functional decoration.

Have you made a diaper cake before?

Check out other baby shower posts:

Baby shower activity - make a wish tree!
Marshmallow Baby Rattle Shower Favors
Chocolate covered pretzel giraffes
Baby shower overview - complete with a "cravings corner"


Monday, October 7, 2013

Tell Us Tuesday #10

Welcome to the Tell Us Tuesday party everyone!  We’re excited to see what you’ve been up to this week!  Stop by every Tuesday to link up your latest blog posts and show off what you’ve been doing, then check out the other links and find new bloggers to follow, inspiration for new projects, parenting tricks, or a new yummy dinner idea.

Since this party is hosted by several bloggers, your links will be on multiple sites!

Much Ado About Somethin


Here's what your hosts have been up to this week...


Check out this easy Nutella & Fluff Ice Cream recipe.  It's seriously some of the most delectable ice cream ever!

A hodgepodge of the last few weeks - a beautiful fall appetizer spread, Toby's new friend, apple picking, trivia night, and a cool art project in downtown Boston.

Head over to Courtney's blog to find out what was SO exciting for her son Preston to warrent a face like this!


Now for some of the features from last week!

Food Features
These Banana Bread Pancakes look delicious.  Hellooooo happy Saturday mornings!

White Chocolate Macadamia Nut French Macarons!!!  I believe that's all I have to say.

DIY Features


Check out The Pin Junkie's DIY Rustic Planter Box.  It'll be enough inspiration for you to pick up that pallet you see on the side of the road next time.  ;)

I love a good thrift store makeover...and this cabinet is a beautiful one.

Ladies Tellin' It Like It Is


The Jenny Evolution has put together several Halloween Sensory Bins that are great for kids.  Check'em out!

Ashley over at Sabers, Spurs and a Pink Stetson is working on baby led weaning - check out what her little girl's new favorite foods are!


If you were featured, grab a button!
I've Been Featured

Now to PARTY!  Just a few basic rules we’d love for you to follow:

- Tell us about your recipes, parenting tips, DIY projects, or your family vacation – we want to see it all!
- Follow each of us so you’ll never miss a party.  Follow on GCF, Bloglovin’, or your favorite reader – we’d love to hear from you!
- Add a party text link or button to your blog.  This helps us in exchange for letting ‘ya link up!  The more people that know about the party, the better.
- Click around – find a few links that interest you below and check them out!  Better yet, leave them a comment and tell them where you came from!
- Spread the word – Share the party on Facebook and Twitter so more can join in the fun.  The more people that find out about Tell Me Tuesday, the more it benefits you!  
- We’d also love for you to follow us on Facebook and Twitter.  We follow back! 
- By linking up, you’re giving permission for us to potentially feature your posts on the blog or social media.


Thursday, September 5, 2013

Shark Cake

It's no secret my friend Ann likes to throw theme parties.  More people really should - they're such fun! The latest theme party happened a few weeks ago and was inspired by two HUGE cultural obsessions of the moment - Shark Week and Sharknado.

A shark party, you may ask? How fun could that really be?  Well let me assure you there's nothing like a crazy shark flick, silly costumes, thematic food, a giant remote controlled helium balloon shark, and crazy friends to make a fantastic evening!  I'll share a few pictures from the night later, but first I'm going to show you how to make a super-cute shark cake that will impress your guests (and not cause you too much of a headache).

This cake will serve between 12-16 people.  Use this post as a how-to if you'd like to make this cake yourself...or just enjoy the progress pictures!  It's kind of fun to see how it comes together!


Here's what you'll need

Three 8" square cakes
Buttercream frosting
Fondant
Black gel color
Brown gel color
Blue gel color
Red gel color
Crisco
Toothpicks
Wooden skewer
Rectangle cake board

And here's how to assemble your shark cake...


1 - Cut two of your 8" cakes so they are 5" x 8".

2 - Now you're going to stack your shark.  Place the two 5" x 8" takes on top of each other.  Then place the two extra strips you cut off together on top of those (to make three layers).

3 - Ice between these three layers, re-stacking.

4 - Spread some icing on a cake board and place your cake on top to secure it.  Then ice the outside of the your cake and refrigerate for 1-2 hours until icing firms.


5 & 6 - Now it's time to carve the cake!  First we're going to carve the shark's mouth.  It's a good idea to trace out your cuts with the tip of your knife before cutting - you can always take more cake off, but you can't add it back on!  This cut should start at the top of the 2nd layer of cake and curve down to the cake board, but should not go all the way through the cake.  You're actually going to cut a chunk out of each side, leaving about 3" in the middle, which will be the boat.

7 - Carefully angle the first layer until it reaches to top of the boat.  This angle should not be as steep as the mouth angle.

8 - Cut a 5" x 3" piece out of your third 8" square cake, and place it on the board at the back of your shark.  With the tip of your knife, trace the shape of your shark on one side of the cake.  Once you're happy with the curve of the shark, begin cutting pieces of cake off until you're happy with it!  Just remember - cut carefully - you can always take more off.


9 - Continue taking bit by bit off your shark - round the corners at the top (sharks aren't square!), smooth the edges of the cake...get creative - he's your creation!  Add a small (two layer) piece of cake to the front of the boat, so it extends about 1.5" past the top of the shark's mouth.  This is going to be the tip of the boat your shark is chomping on.  (If this little piece tries to fall off, use a toothpick to attach it to the rest of the cake.)

10 - Carefully shave away at the "boat" until it looks like a boat.  Your boat should be narrower at the tip, slope inward at the bottom, and have a lip (the railing) around the outside (so pull a little cake out of the inside top).  Cut away most of the excess board so it mirrors the body of the shark.  Do not cut the board to fit the shape of the boat too - it will be too flimsy.  We'll cover that up later!  Then ice the entire cake and place it in the refrigerator for 1-2 hours to set.


11- Mix grey fondant (white with a little black), until the color is consistent.  As you're working with fondant, you'll need to add a little Crisco to the ball so it doesn't stick to your hands.  Tape two sheets of wax paper on a flat surface and cover it with Crisco.  Roll out your grey fondant so it's about 1/4" thick, then carefully cover your shark body.  Using scissors or an exacto knife, cut the grey fondant so it ends at the edge of the sharks "lips".

12 - Mix pink fondant (white with a little red), until the color is consistent.  Roll out small pieces and fill in the area that would be the shark's open mouth.

13 - Mix light brown fondant (white with a little brown), until the color is consistent.  Roll out a piece and cover the entire boat in one move.  Cut three long, thin strips of the brown, that will be the upper rail and "boards" on the front of the boat.  Measure the appropriate lengths and attach to the boat by dabbing a little water on the back of the "board".  (Water helps fondant stick to fondant.)  Using a butter knife (or the side of the fork), gently draw the rest of the boards along the sides of the boat.  Place the cake back in the refrigerator for another hour while you work on steps 14 and 15.

Roll out more pink fondant and cover the rest of the inside of the mouth.


14 - Now it's time to make the accessories!  Roll out some white fondant and cut out teeth that are approximately 1/2" long.  Cut toothpicks in half and slide the toothpick halfway in the tooth.  Set these aside so they dry - the worst thing that could happen to your shark cake is for it to have floppy teeth!

15 - Roll out more grey fondant (thicker than the teeth).  Using a pizza cutter, cut out the shape of a shark fin.  Slide three toothpicks along the edge that will touch the shark so they are about 1/3 in the fin, 2/3 sticking out.  Let the fin set until it's completely dry.  (Second worst thing would be a floppy fin...)

Now it's time to make the mast for your boat.  Make a little "snake" of brown fondant.  Wrap the fondant carefully around about half of a wooden skewer and carefully roll it with your hands until it's no longer lumpy.  Cut out a rectangle piece of red fondant (add a little more red gel to the pink that's leftover from the shark's mouth) and attach to the top of the dowel using a little water.  If you have food-safe markers, feel free to decorate the flag.  I decided to go with a K, for Krentz (the last name of the friends throwing the party).  Nothing like having your shark eat the family boat of your hosts!  ;)

Once your shark's teeth are hard, stick each one around the rim of the shark's mouth.  Using small ovals of white fondant, place on the shark's eyes (attach with a dab of water).  You can draw on the pupil with a food-safe marker or by adding a smaller dot of black fondant.  Then, using a butter knife or edge of a fork, carefully etch in the shark's gills (three on each side).  Be careful not to cut through the fondant - you just want to etch them into his skin.

Then it's time to work on presentation.  Every shark should be in water, so we're going to do just that by covering a small, rectangle cake board (you can cut a larger one to the shape you'd like).  Mix light blue fondant (white with some blue), until the color is consistent.  Spread a very thin layer of white icing  on the cake board, roll out your blue fondant, and cover the board.  The fondant should  just go over the edges of the board, so use scissors to trim.

Spread more white icing down the middle of the covered board, and place your shark cake on top.


Color some of your buttercream icing with blue gel and fill a piping bag (or a Ziploc bag with one corner cut off).  I didn't use a piping tip for this - I just cut the tip off the disposable piping bag.  Fill your bag with the blue icing, and pipe waves around your shark.  Make sure your waves cover up the white board around your boat, then go down the sides of the shark.  The piping motion you'll be using is more pressure at the beginning, then less pressure as you pull away.

The final touches are the fin and boat mast - carefully stick the toothpicks into the shark's back, where you'd like the fin to live.  Then stick the end of the boat mast in right at the back of the boat, coming out at an angle.


Make sure your cake stays in the refrigerator until you're ready to serve.  Then remove about 45 minute to 1 hour before you're ready to cut in!

for fantastic recipes, cake how-to's, and diy projects!

Now for a few pictures from the party!


Now...go wow your friends!


Wednesday, August 14, 2013

Polka Dot Painted Vase

A few weeks ago, I got the urge to paint.  We'd stopped by a discount store before going to the movies with some friends, and I got several glass vases and wine glasses that I could paint, so I pulled them out of the closet and got to work on one.  The nice thing about thrifting is that you'll run into TONS of glass items along the way - pick one up and turn it into something beautiful!

I'd seen some painted glasses with polka dots around, so I decided to give it a try for myself.  It's really simple - you can easily make this cute vase at home!


You'll need:
Clean, glass vase
4-5 different colors of paint (enamel or acrylic)
Small paintbrush
Paper plate
Krylon Glitter Blast Clear Sealer (if you used acrylic paint)
Newspaper

I decided to use blues and yellows for my vase - a darker teal, light blue, yellow, and cream.  Put a dollop of each color on your plate, and begin dotting away!

Starting with the darkest color first, make small dots in a random pattern all the way around the glass, covering the bottom 2/3 of the vase.  Then move to the next darkest color, and so on until you've cycled through all the colors you're using.  Once you've cycled through your colors once, start over!  You'll cycle through your colors over and over (10 to 15 times depending on how dense you'd like your dots).  As you're dotting away, pay attention to what colors are near where you're painting.  Try not to get too many light blue dots next to other light blue dots.


I decided to add some "fading dot legs" to the top 1/3 of my vase.  Once I was happy with the bottom 2/3 dots, so started painting dots that wiggled to the top, becoming more spaced out as they went up.  It gave it a fun, whimsical feel I'm really happy with!


Once the paint dried, I realized I'd used acrylic paint.  OOPS.  Acrylic paint will wash off of glass, so I knew that wouldn't do, so I headed to our local craft store to find some kind of clear glaze to cover the vase.  I ended up settling on Krylon's Glitter Blast Clear Sealer, and it worked like a charm.  It's original use is to seal in their glitter spray, but it did the trick with my acrylic pant too!  Moral of the story - if you've got acrylics laying around, don't bother buying all new enamel paint - just grab some of this sealer and you're ready to go!

I did three coats of the sealer, letting each coat dry for at least 30 minutes.


Then fill your vase with flowers and enjoy!  So much more fun than a plain glass vase.


Monday, July 29, 2013

ALL ABOUT NAILS - Fabulous Nail Polish Designs, Nail Care, and Where to Buy Polish

Hey everyone! I'm Bailey from aka Bailey I'm so excited to be guest posting for Lauren today! She and I have been friends and colleagues for years, and she is the one who pushed me to get into blogging myself. My own blog is kind of an eclectic mix of Vancouver tourism, fitness, shopping (mostly thrifting), trying my darnedest to cook things that don't taste awful, and (my personal favorite) nail polish adventures! I decided to focus on the latter for my guest post today, so if you own a few nail polishes but feel like you aren't "good" enough to use them for anything cool... YOU THINK AGAIN RIGHT THIS INSTANT.

I'm going to outline a few of my favorite nail care basics, plus some of my favorite "cool" things you can do to your nails that will end up looking like you must have spent a LONG time on them.... when really you didn't! #Winks! It'll be our little secret how easy these things really are.

First up is nail care!

Now, if you're anything like I was a year ago, you might think that your nails are just things that exist on the ends of your fingers and that, aside from keeping them clean and cut to a length of your choice, you don't need to do anything else to them. Well... I mean, that's totally fine. Those are two good areas to start (and end, if you want!), but if you want to give them a little extra 'somethin somethin', here are a few easy (and cheap) things you can do:

- Cut/file all 10 of them to one uniform shape and length. I used to be guilty of letting all my nails end up totally different shapes/lengths (because I'd bite them and pick at them), but once I started getting them all looking like Irish twins rather than distant cousins... well I have to say my entire life improved tenfold and I immediately received a raise at work. Just kidding. But my nails did look nicer, for a minimal amount of effort. Bonus: Nail files can cost as little as 99 cents. #GetSome.

nail files, emery boards

- Use a cuticle softener. This is a relatively cheap product that will soften your cuticles enough to push them back safely and without irritation or cutting. I use an affordable Revlon version, applying it to my nails with the brush, then rubbing it into my cuticles with my fingertips:
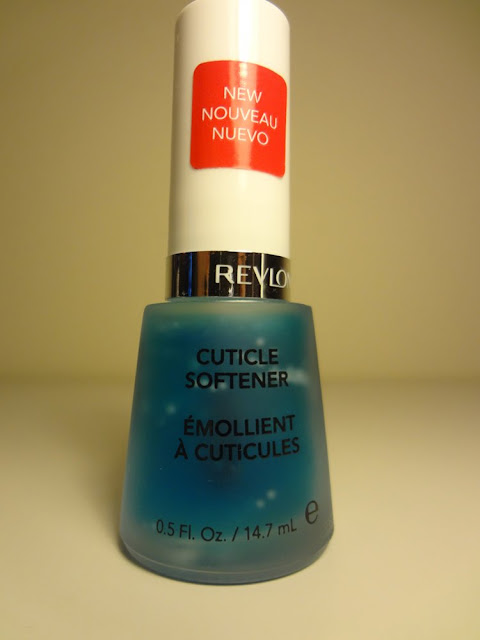
Revlon Cuticle Softener

- After you massage in your cuticle softener, then you can use a cuticle pusher-backer... for lack of a better term. This will be a very inexpensive tool that you can use to - you guessed it - push back your cuticles. I've seen versions that are made of stainless steel, but I prefer to use this awesome plastic one with a rubber tip because it's much gentler than the harsh steel and its soft rubber tip doesn't cut or damage my cuticles or surrounding skin.


- I also use a cuticle massage cream after I push back my cuticles. This softens and moisturizes your cuticles and surrounding skin and keeps them looking really healthy. I use Sally Hansen Cuticle Massage Cream. You don't necessarily need this step, but I personally really like the healthy glow and un-chalky appearance of my finger tips after I massage some of this stuff in there:


TIME OUT. Now, you might be asking yourself, "Dude... seriously... what is this girl's deal with cuticles? Why is she paying so much attention to them?"

Well, you'd be amazed how much the look of your nails can change depending on how your cuticles are looking. Again, I used to not give too much of a crap about them. I'd let them get like this:

Cuticles looking busted

And - NOT TO BRAG OR ANYTHING - but they look way better nowadays:

Healthy cuticles

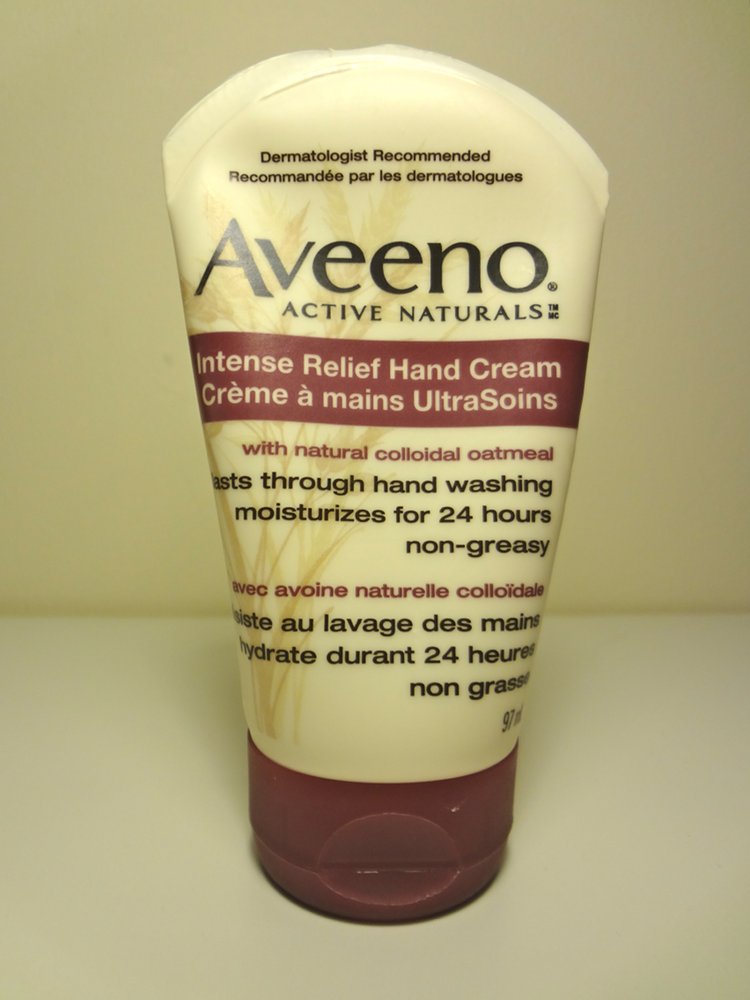
- The final step of my nail care routine (before actually painting my nails) is using a nice thick, non-greasy hand cream. I've heard that hands, neck and chest are 3 areas that can really show your age, so these are 3 areas that I've started to give more moisturizing attention to lately. Prevention is the key to.... preventing things you don't want to happen, so if you don't want wrinkles popping up, it's time to get serious about moisturizing, ladiiiies! I've pretty much fallen in love with this Aveeno Active Naturals Intense Relief Hand Cream:
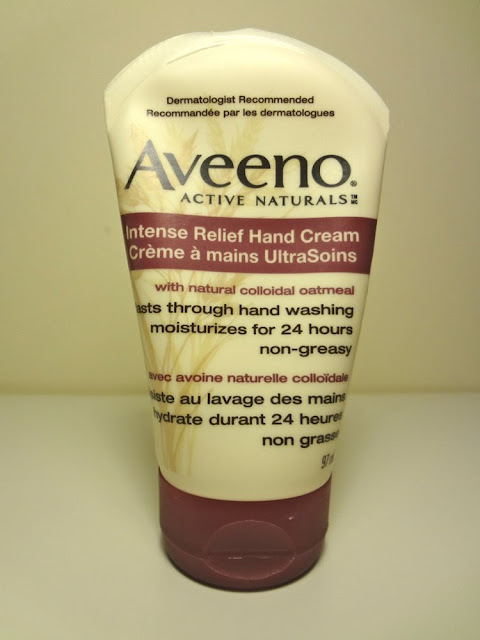
Aveeno Active Naturals Intense Relief Hand Cream

Like I said, I've made hand cream the final step of my nail care routine, but I also do my best to apply hand cream every night before bed, too.

Now that we've gotten all the nail care out of the way,  it's time for the fun stuff - POLISHIN' YA NAILS!

Here are some easy things to paint onto your nails:

- Accent nails:  You may or may not have heard this term before, but an "accent nail" is a new-ish thing in the polish world wherein we are now allowed to paint one or two of our nails a different color than the rest, without anyone accusing us of having multiple personalities. I often use my ring finger as my accent nail:

Purple Nails with Glitter Accent Nail

Mint Nails with Neon Accent Nail

Pink Nails with Silver Glitter Accent Nail


It's a fun and very easy way to jazz things up. If you have a sparkly or glittery polish, try using this as your accent nail color and letting the compliments roll in.

- Polka dots:  With a dotting tool (which are now sold in most places where nail polish is sold) or a toothpick, polka dots are really easy to make. Simply paint your nails your base color and allow it to dry completely. Next, take your polka dot color and using your polish brush, put 3-4 drops of polish onto a piece of scrap paper. Then just dip the tip of your dotting tool/toothpick into the wet drops of polish and use it to "stamp" your nails with dots:

Dotting tool, nail polish


Dotting tool


Polka Dot accent Nail

Making the dots look really great takes a little bit of practice - I like to practice on a piece of paper before I try it on my nails. No shame in practicing!!

- Color blocking: Choose 2 nail polish colors to work with. Paint all of your nails 2 coats of the lighter color and let them dry completely. And I really mean totally, completely, absolutely dry! Next, use strips of scotch tape to block off half of each nail:


Then paint over the exposed half of your nail with your second polish color. Before it dries, carefully pull away the strip of tape on each nail, revealing a color blocked look.

- Leopard print: This one is like the king of nail polish looks and is much easier than people think it is... In fact, I hesitate to even share the secret because I kind of like people thinking that it takes an insane amount of skill to do, hehe! To paint a leopard print onto your nails, first choose 3 different polish colors - your base color, your "spot" color, and your "around the spot" color.


First, paint your nails 2 coats of your base color.

Next, using your spot color, pop a few spots around your nail by just tapping your nail polish brush gently in a few different places around your nail. Leave plenty of room between these spots.

Then, place a few drops of your final color onto a piece of scrap paper. Dip a toothpick into the drops and use the toothpick to draw some brackets ( ) and U's around the spots. Use a quick stippling motion for this part.

Lastly, add a few random spots around the nail in the empty spaces, using the same color that you used for your brackets and U's.

You can see a step-by-step of leopard print nails via photos over here on my blog.

So now that you know what to do, all you need are the polishes to do it! The good news is that you don't need to spend a lot of money on nail polish. There are some pretty expensive brands out there that sell their polishes for $12-$25/bottle, but to them I say.... "PSHT." We can do better than that, ladies! Head to a Target or a CVS/Walgreens and scope out their selections of Revlon, Sally Hansen and Sinful Colors polishes. Those are 3 brands that I love and none of them cost more than $5/bottle (in the States, that is... Here in Vancouver, BC everything costs 1 first born child.)

I hope that this has inspired you to try some new things with your nails! Check out my blog for more relatively easy nail ideas - I post a new nail polish blog every Friday!